Google Play Games is a new service that allows you to play Android games on your Windows PC. It is currently in beta, but it is available in India. To install Google Play Games on your PC, you will need to meet the following requirements:
To install Google Play Games on your PC, you will need to meet the following requirements:
- Windows 10 (version 2004 or higher)
- IntelⓇ UHD Graphics 630 GPU or comparable
- 4 CPU physical cores (some games require an Intel CPU)
- 8 GB of RAM
- Windows admin account
- Hardware Virtualization must be turned on
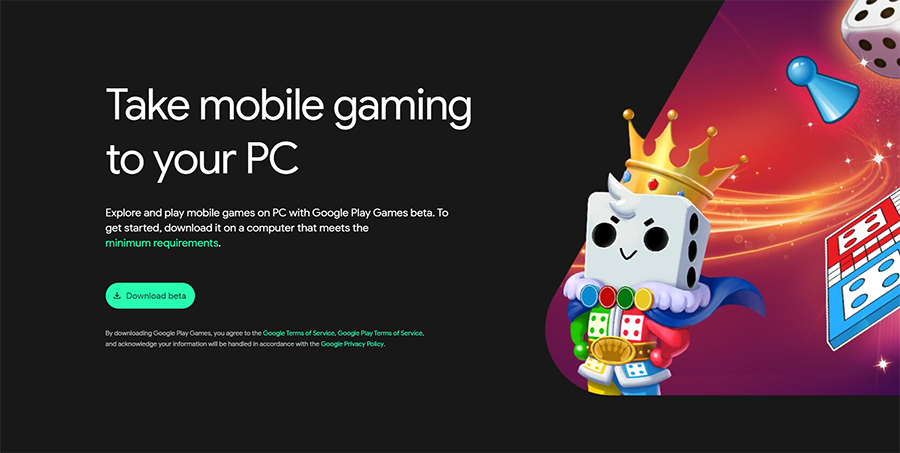
(Step 1 of 4) Download Google Play Games on PC
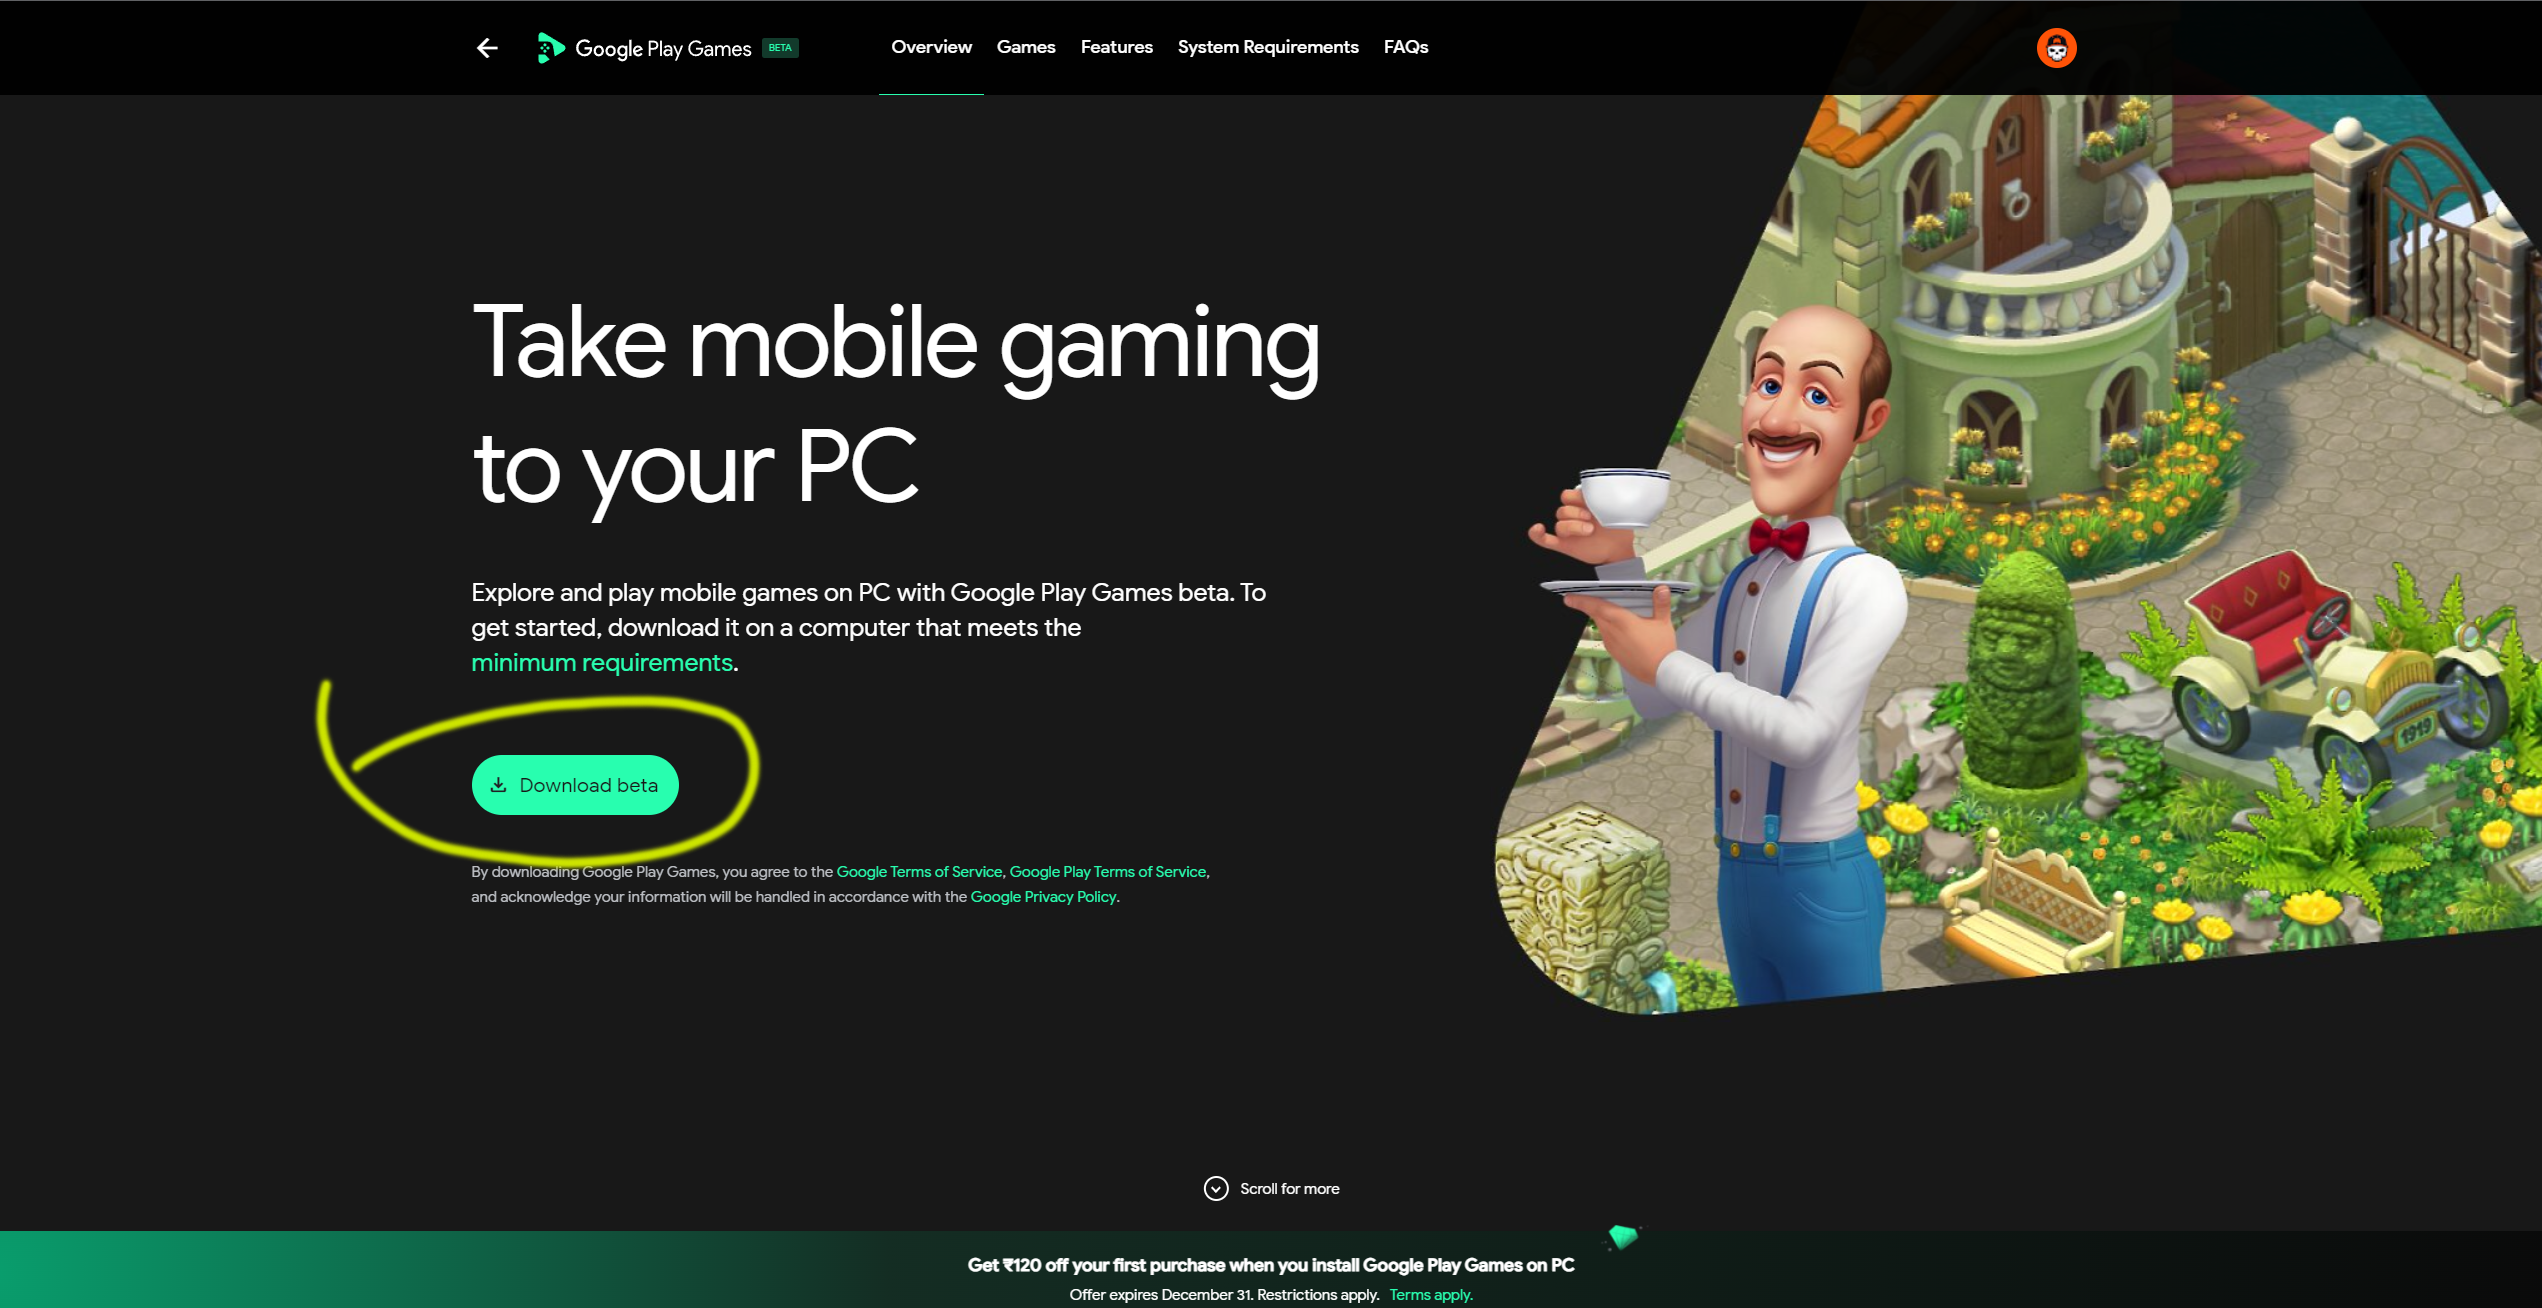
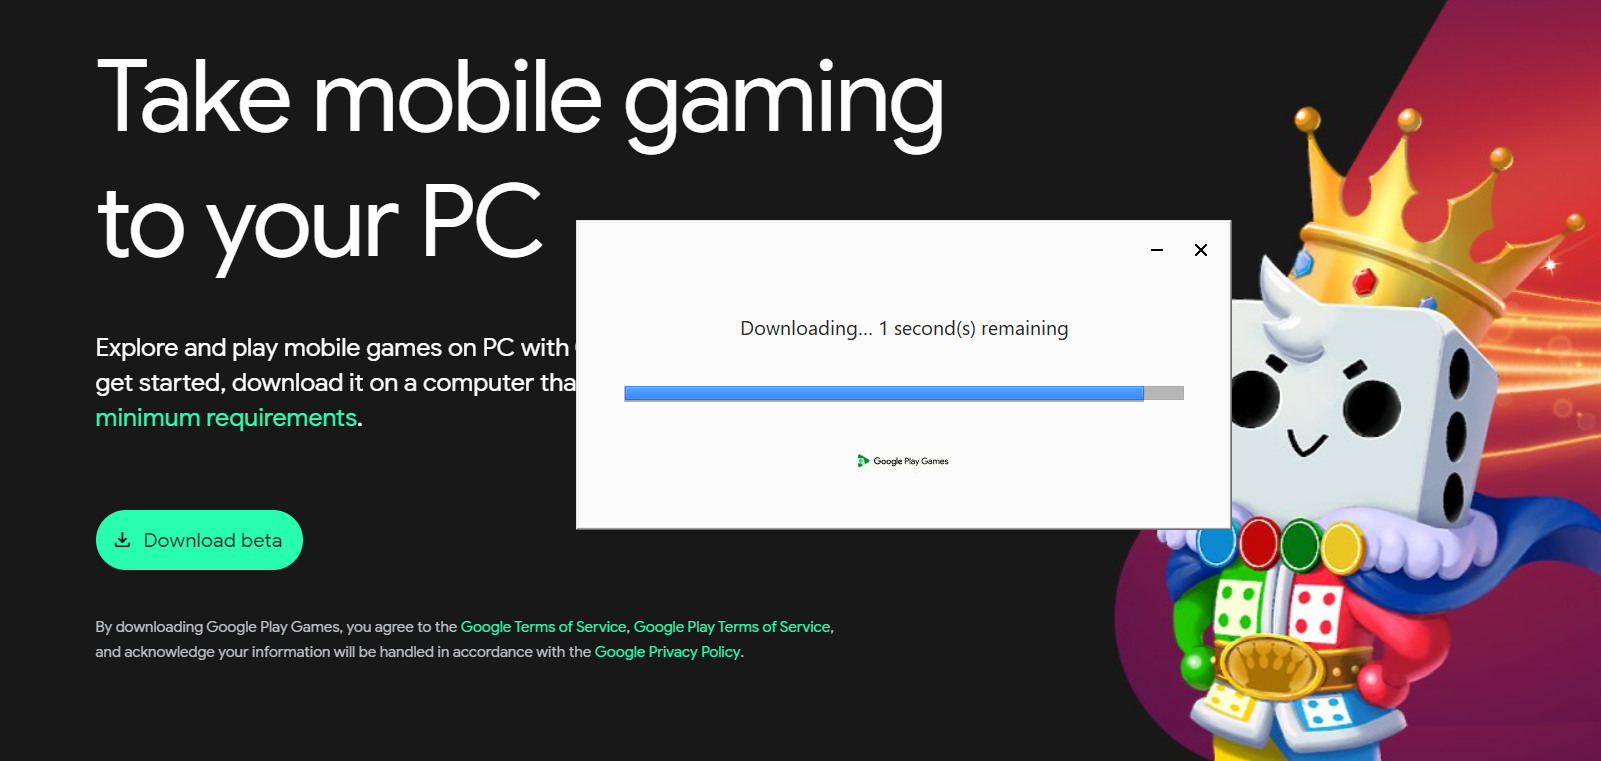
You can download Google Play Games on your PC by simply visiting this link https://play.google.com/googleplaygames and clicking the Download beta button as you can see in the above image.
Now wait while the program starts downloading on your system.
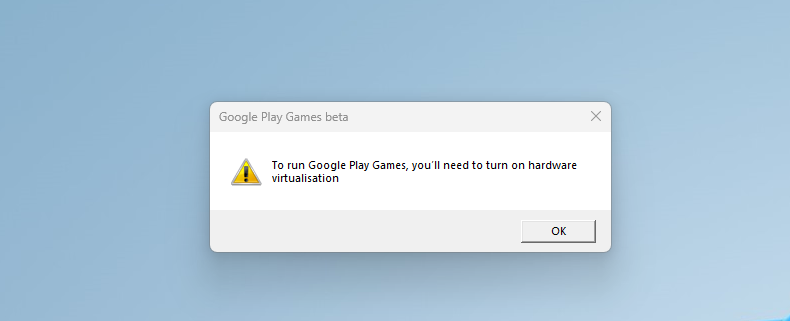
Once done downloading, you can install the application and start using it, however, it requires hardware “Virtualization” enabled.
But, here is the tricky part.
If you do not have your hardware “Virtualization” enabled, you will receive an error while installing Google Play Games on your PC. Not to worry though, enabling hardware “Virtualization” in your PC’s BIOS settings is simple.
Just follow the next step to resolve this error.
(Step 2 of 4) Enable Hardware Virtualization
“Virtualization” is important for Google Play Games because it allows running the games within isolated virtual environments, enabling efficient emulation on various host systems. Enabling hardware “Virtualization” in your PC’s BIOS settings is simple. Here’s how:
Before you can install Google Play Games, you need to enable hardware “Virtualization” in your PC’s BIOS settings. Turning on “Virtualization” usually depends on your motherboard manufacturer and not on the Windows version you have. To do this, follow these steps:
“Virtualization” is also known as SVM on AMD-based CPUs and VMX on Intel-based CPUs. You need to enable either SVM or VMX on your PC BIOS. I have added all the important links to enable the “Virtualization” of popular motherboard manufacturers.
- Enable “Virtualization” on ASUS motherboards
- Enable “Virtualization” on MSI motherboards
- Enable “Virtualization” on Gigabyte motherboards
- Enable “Virtualization” on Acer motherboards
If your motherboard manufacturer is not listed above, these are common steps, if not fully accurate.
- Restart your PC and enter the BIOS settings – Press the designated key during startup (usually F2 or Delete).
- Find the “SVM / Virtualization” or “VMX / Intel Virtualization Technology” setting – It might be under the “Advanced” or “CPU Configuration” section.
- Enable the virtualization setting – Just toggle it enable/on.
- Save changes and exit BIOS – This will ensure the changes take effect.
(Step 3 of 4) Install the Google Play Games Beta
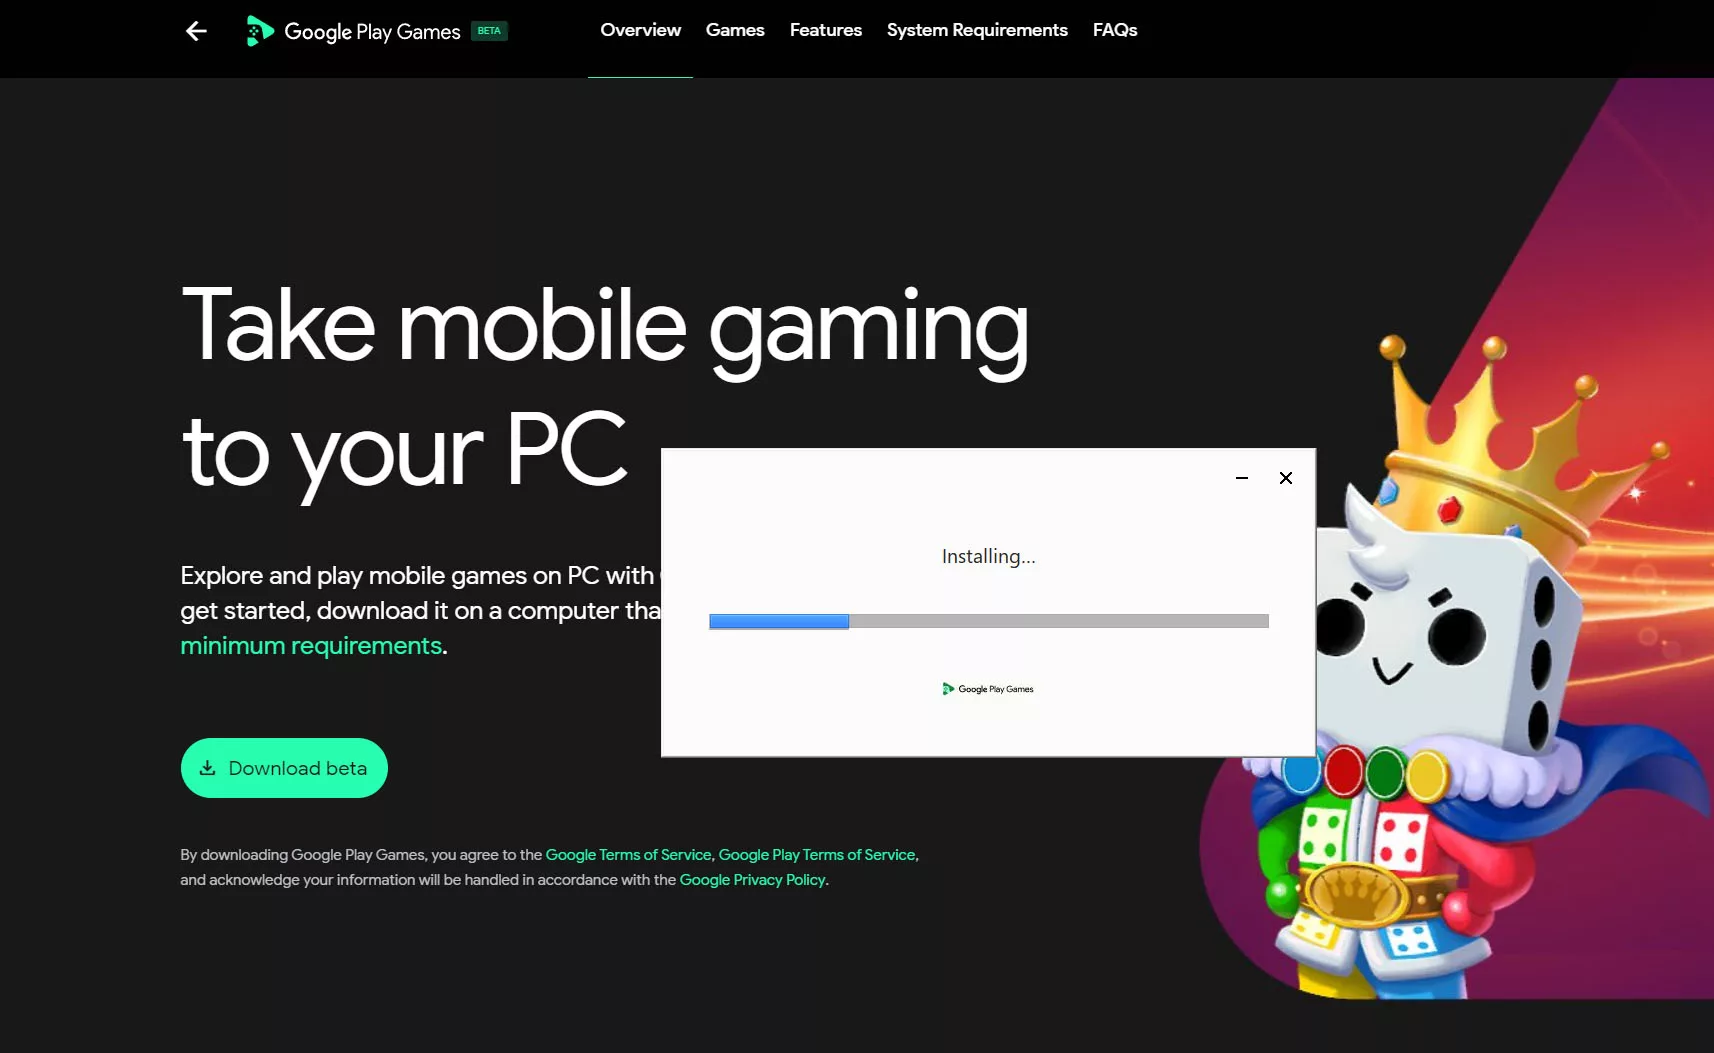
Now that “Virtualization” is enabled, it’s time to get the Google Play Games Beta.
Try running the installer file again and follow the on-screen instructions to start installing. If everything is correct then the program will be installed successfully.
Right after installation, this app takes around 2.27 Gb of storage in your system without even having any game downloaded.

(Step 4 of 4) Getting Started with Google Play Games
Follow these additional steps to get started.
a) Sign in with your Google Account
Once the installation is complete, you will need to sign in to Google Play.
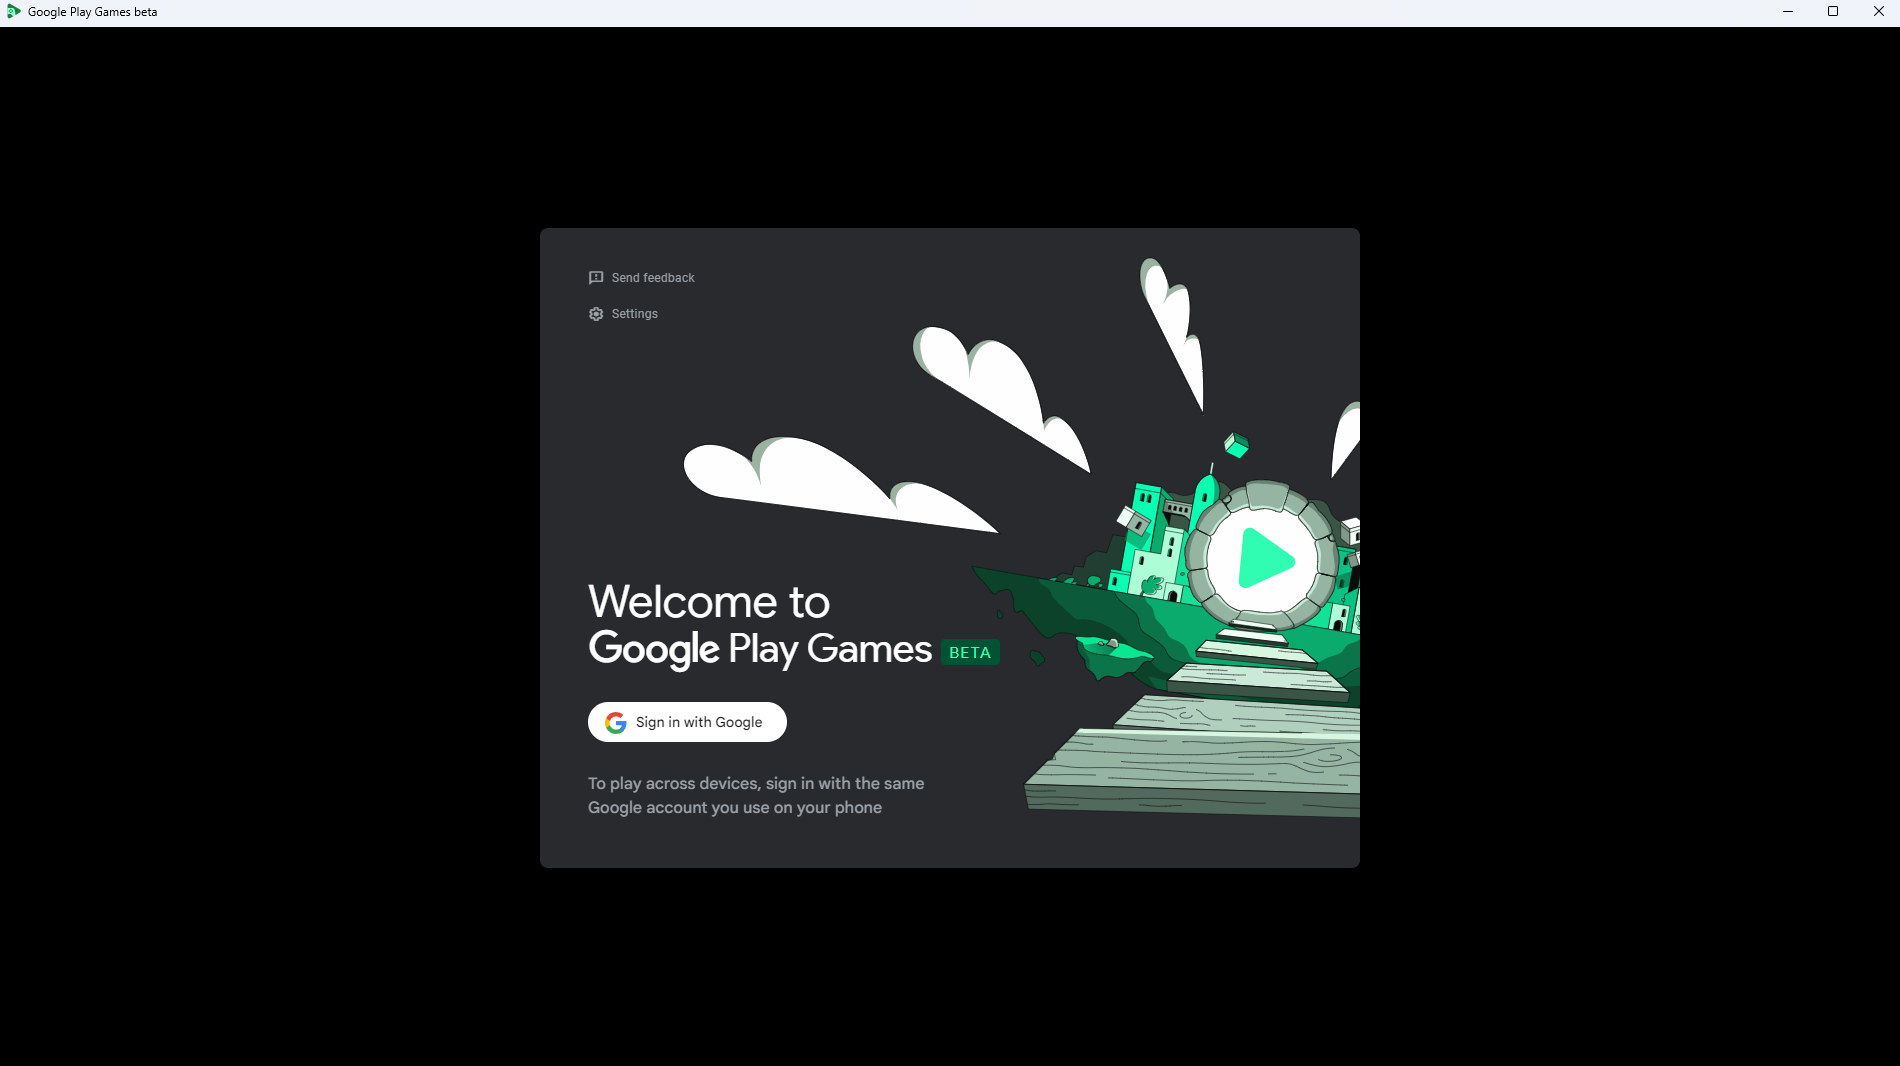
You can use the same account that you use on your Android device. Use your username and password to log in to your Google account in your browser.
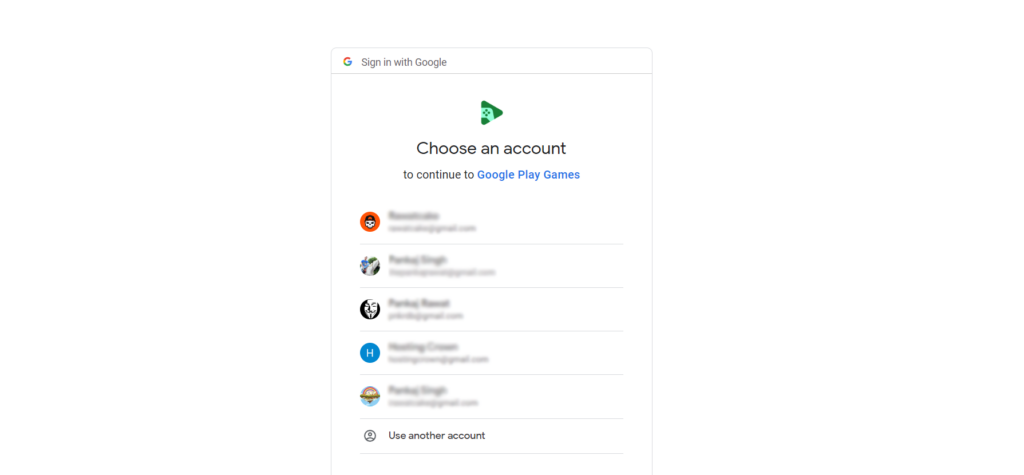
After successful sign-in, you can close your browser window and head back to the Google Play Games on your PC.

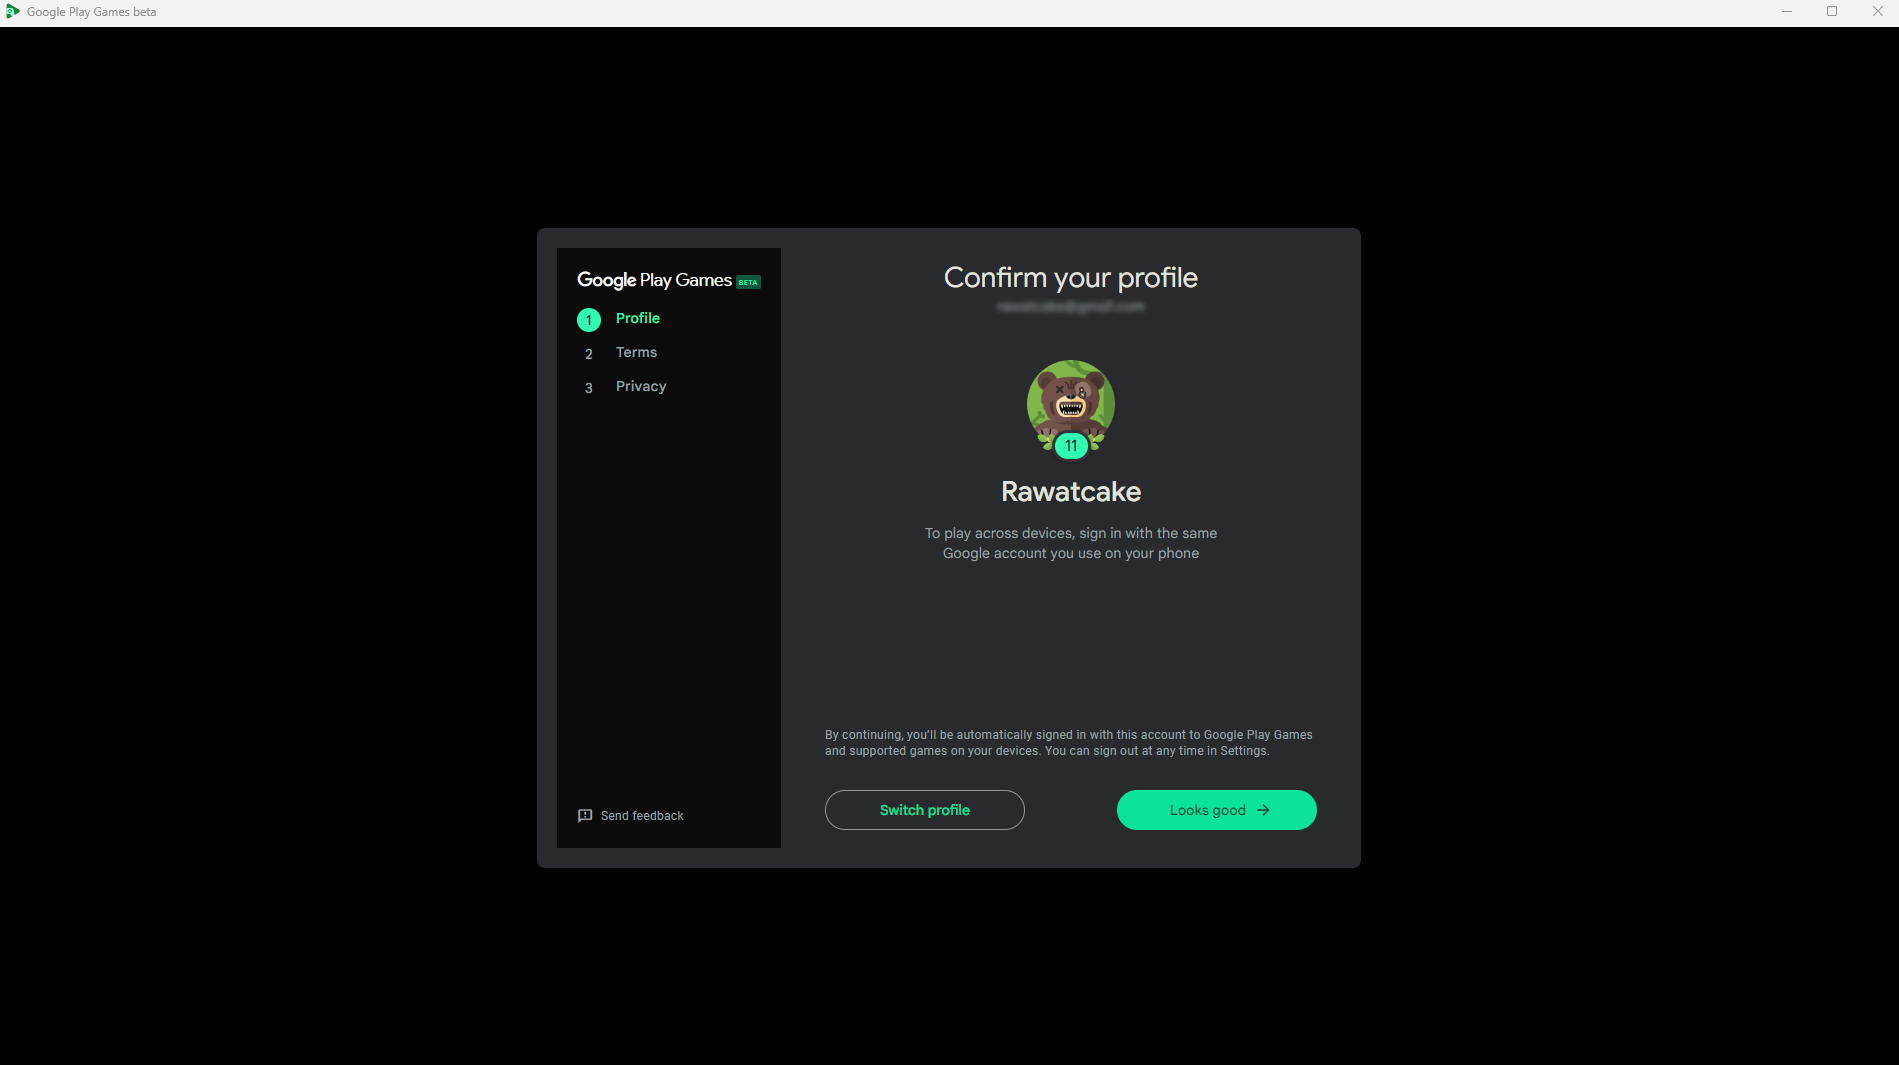
b) Confirm Your Profile
Now follow the instructions on your screen and confirm your profile.
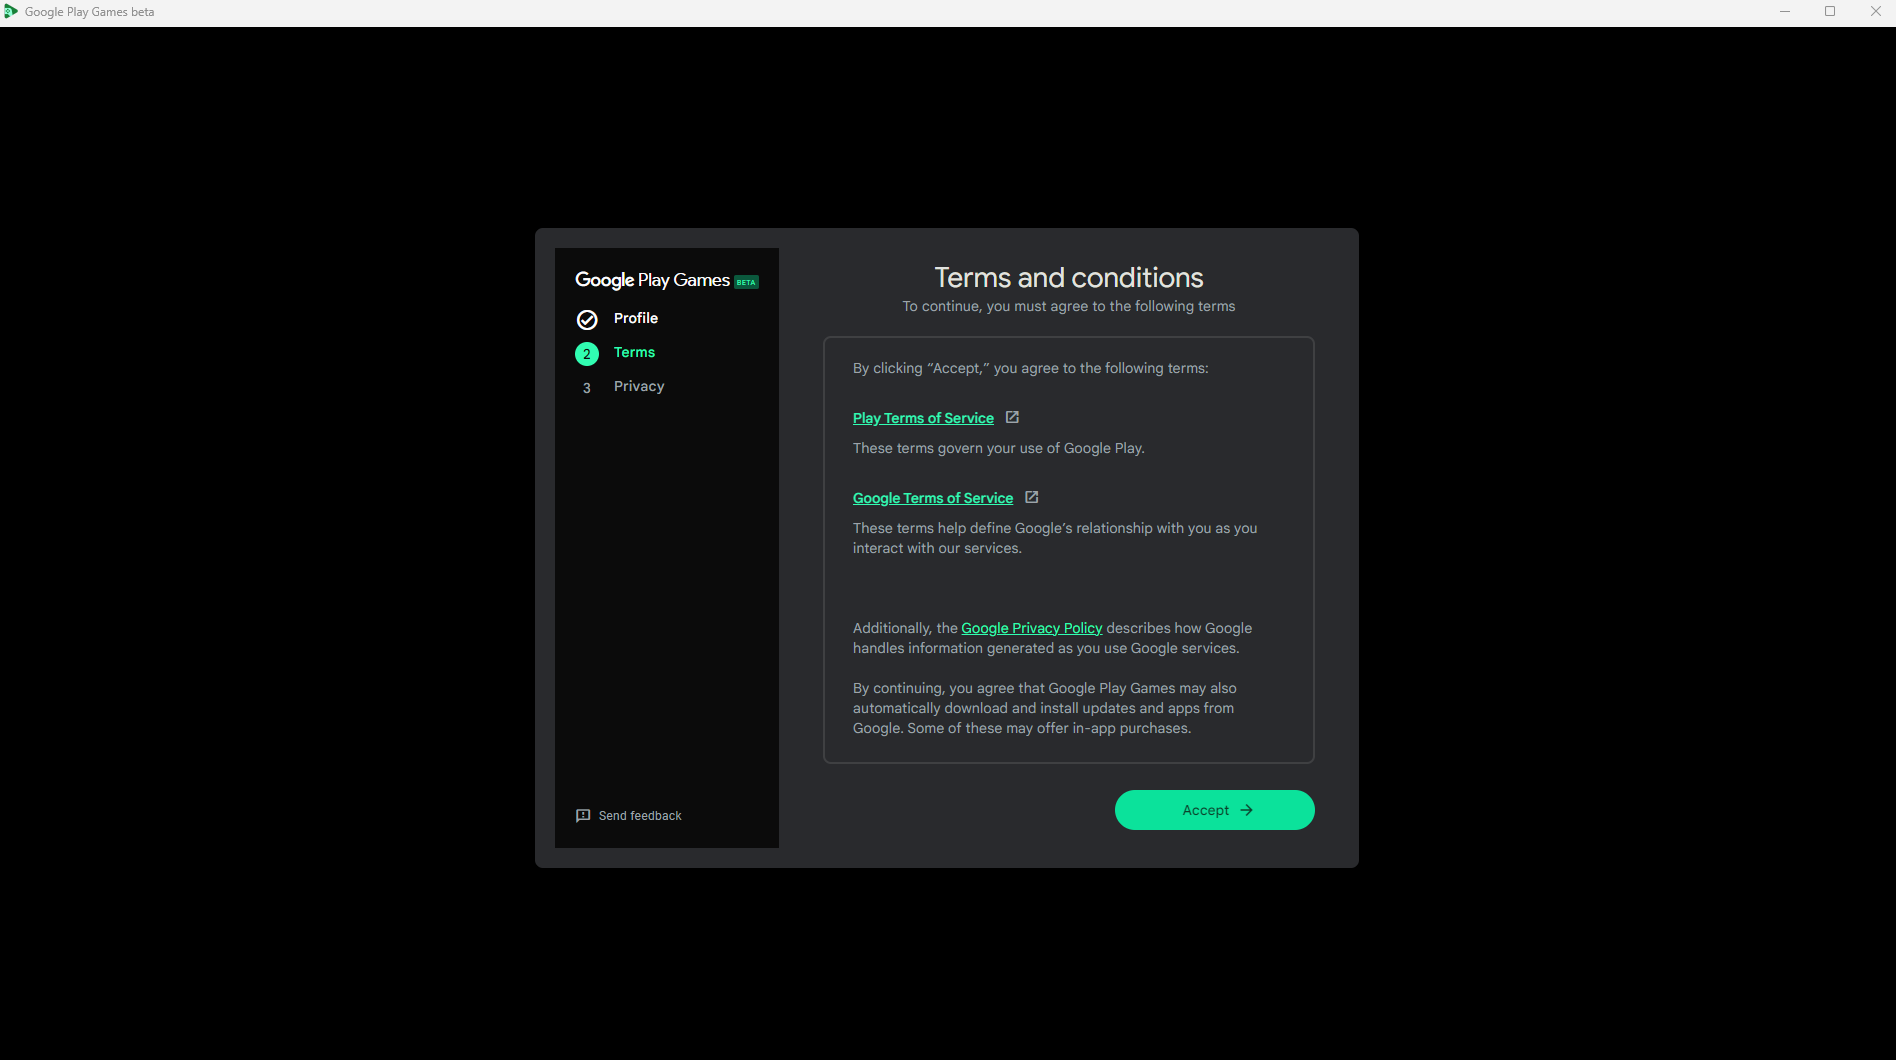
c) Accepts Terms and Privacy Policy
Accept all the Google Terms of Service and proceed further.
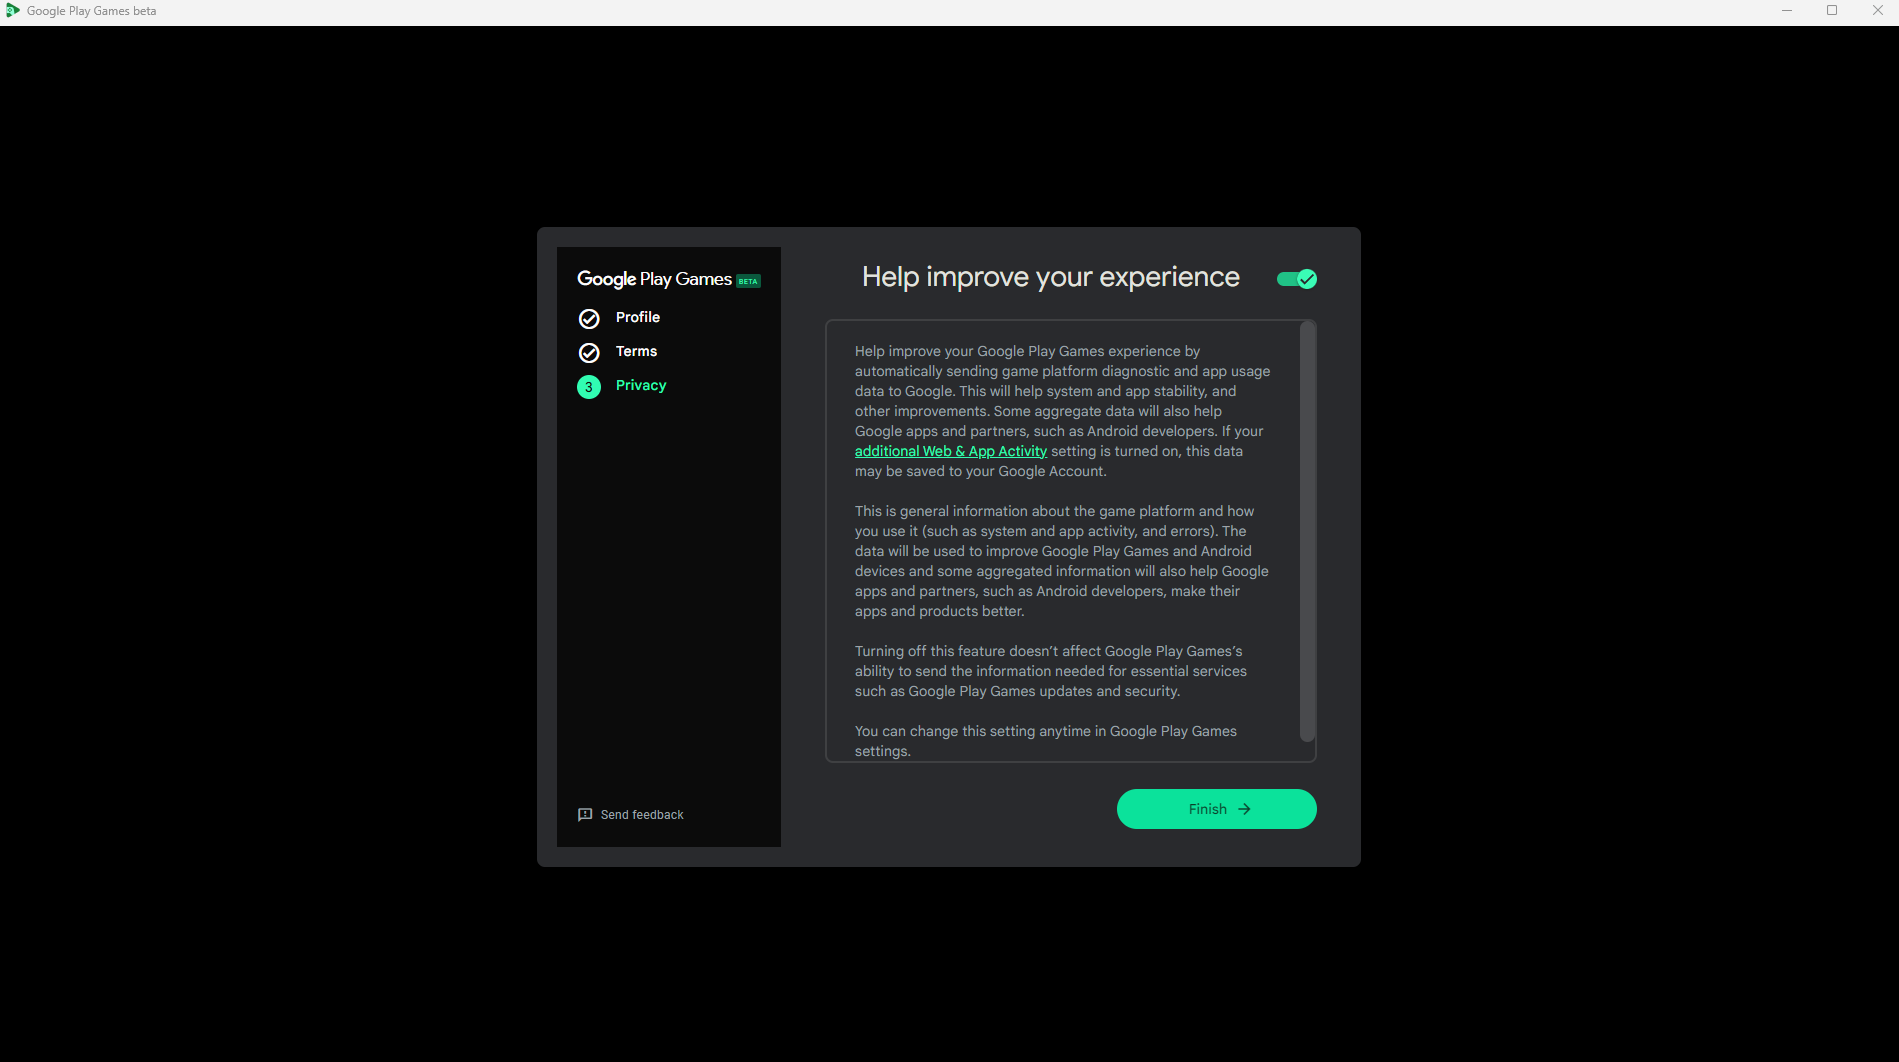
Now, accept all the Privacy policies too. You may disable the “Help improve your experience”, as it is optional, if you may not wish Google to collect application bugs.
d) Turn on Virtualization Settings
Finally, just one more step before you can start playing your favorite Android games on your PC.
Look for a notification in the bottom left corner that says “Enable Virtualization.” Click on it and grant Google Play Games permission to use “Virtualization settings.” The notification reads,
“Additional settings, including Windows Hypervisor Platform, must be turned on to install and play games on this PC. Windows Hypervisor Platform might not work with other emulators.”
Simply click continue and that’s it. Now start playing your favorite games.
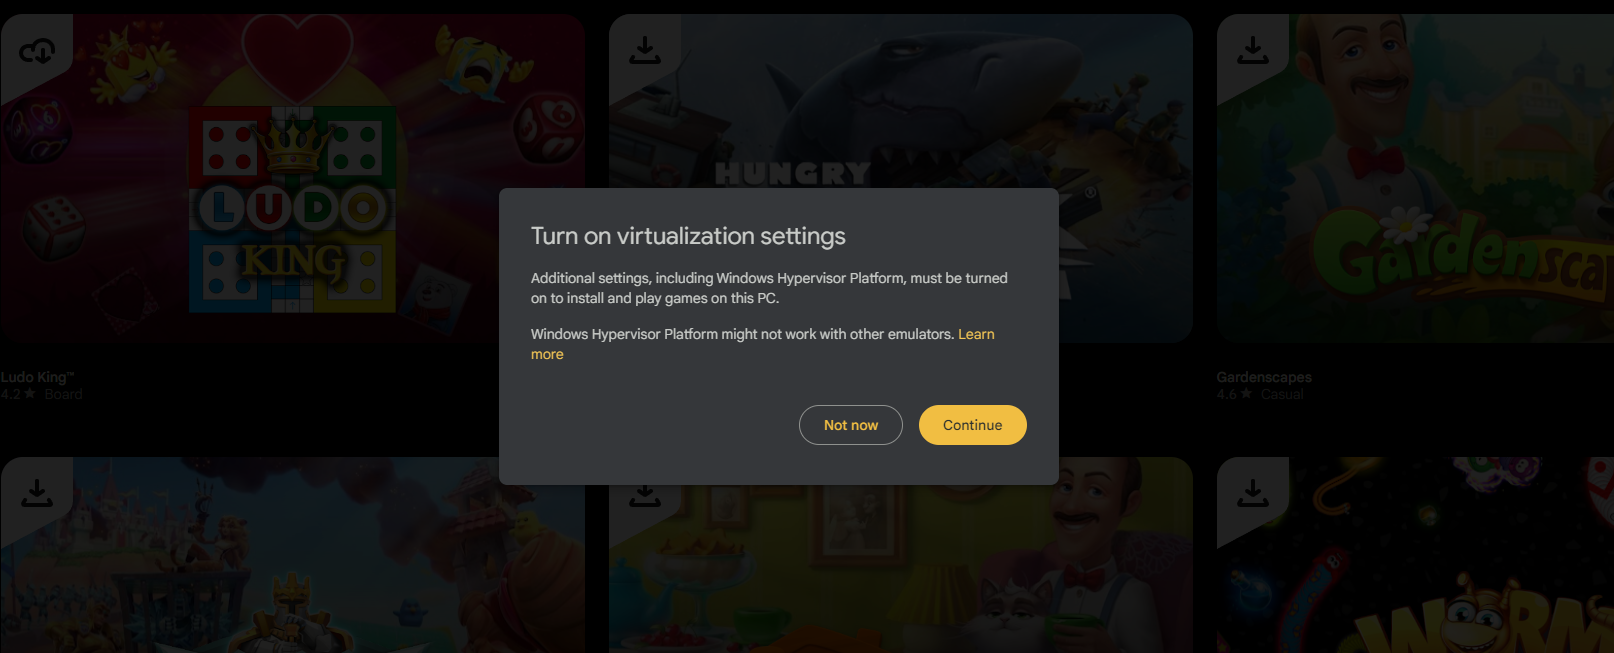
This step is crucial because it allows Google Play Games to access the necessary resources from Windows “Virtualization” in order to run the games. Once you complete this, you’re all set to enjoy gaming fun on your PC!
e) Enjoy your favorite games

Now start downloading your favorite game and enjoy it with your local friends or connect it with your online friends.
Troubleshooting
If you are having trouble installing or running Google Play Games, you can try the following troubleshooting steps:
- Make sure that your PC meets the minimum requirements.
- Update your graphics drivers.
- Restart your PC.
- Uninstall and reinstall Google Play Games.
Conclusion
Google Play Games is a great way to play your favorite Android games on your PC. With the program, you can enjoy all of your favorite mobile games on a larger screen with better performance.
Here are some additional tips for using Google Play Games on PC:
- You can use a controller to play games.
- You can use keyboard and mouse controls.
- You can stream games from your Android device to your PC.
- You can use the Google Play Games app to chat with friends while you play games.
I hope this article helps you install Google Play Games on your PC. If you have any questions, please feel free to leave a comment below.